

Club Meeting: 22 April 2015
Report by Tom Pearson
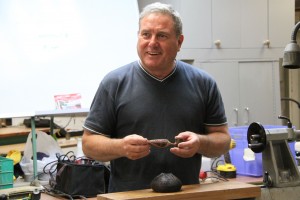
Dave started by showing several types of spoons, and a spurtle which he sells at markets. These are all made from 20 x 50mm blanks, held onto the lathe with Steb centres.
SPURTLE
Dave turns the handle first, using approx 2/3rd of length. Almost exclusively uses a roughing gouge with swept back wings. To turn the business end of the spurtle he re-centres this approx 10 mm off the true centre. This results in a unique shape which stirs the jam or porridge more effectively than the traditional round model. He power sands at each step to 240 grit, then finishes each end with a spindle gouge and parts off the item.
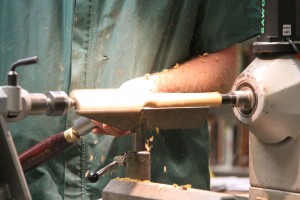
All his utensils are coated with rice bran oil, soaked in a bin, then dried out before giving a final coat of ‘Bee Kind’ wax.
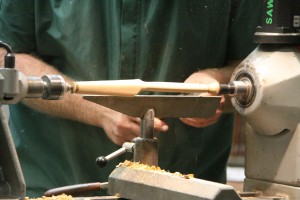 Other items made are a saucing spoon for stirring – basically a flat stirrer with handle and edge turned, then held on the belt sander for final shaping. Dave also makes a stirrer using bandsaw and belt sander, entitled the ‘Martha Stewart’ spoon, basically a flat, thin stirrer shaped into a long ‘S’ shape. No turning needed with this one.
Dave’s ‘carved’ stirring spoons are made in left or right handed choices. Shaped on the lathe, similar to the spurtle, then hollowed using a Pantorouter (see Matthias Wandel’s site) with the spoon held firmly on the bench with clamps.
MEASURING SPOON
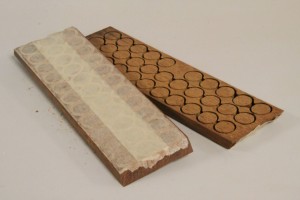
A new innovation for Dave is a measuring spoon made from two pieces of 50 x 50 x 200 mm blanks, held together using double sided tape, clamped together to ensure a good bond, then held between Steb centres to shape the handle. When handle is completed, the two pieces of timber are split apart.
Next step is to hot melt glue and screw the partially completed blank onto an MDF backing board which is held to the lathe with a face plate. At this stage, the ‘spoon’ section is square to enable a place for screws to attach from the back, through the MDF.
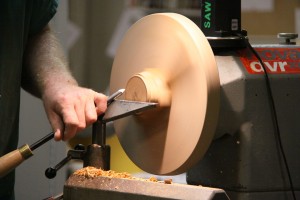 Then shape the outside of the spoon section as far as possible, without damaging the handle. Any difficult to turn spots at the joint will be corrected later using a dremel.
Then remove the partially finished spoon from the MDF, take to the bandsaw and cut off the square remnants from the edge of the spoon. Hold in a chuck which has been fitted with a custom made plastic insert. Dave makes these up from Warehouse chopping boards – they look like a plastic bracelet – very cunning.
Drill a pilot hole in the centre of the spoon to the required depth, then hollow with your favourite hollowing tool. Dave uses a Soren Berger box tool, but any hollowing tool or scraper could do this task. Sand and finish.
The items produced look most attractive and sell readily. Any of these, adapted to our own preferences could prove useful items for our next December sale. Try some out for entry into our end of term judging for ‘Domestic Items.’
Report of Club Meeting: 1 April 2015
Written by Murray Wilton
Bruce certainly does more than his fair share in keeping our club up and running smoothly. It may have been April Fool’s Day, and only 25 members present (while most opted for the Easter Show), but that didn’t prevent Bruce from demonstrating his unique turning skills. When the topic is a baby’s rattle, most of us would be thinking in terms of making it for grandchildren and even great grandchildren. Others might see it as an eminently saleable item. But if you thought it was an easy project you would be very much in error. Bruce waved the finished article to show us where he would be heading. A simple piece, shaped like a dumbell with bulbs at each end, contains little bells that rattle when shaken. The mystery, to be revealed, is how do those bells get inside the bulbs when there is barely a mark showing any join or secret entry point.

Bruce emphasized that in order to achieve a fine result the setting up and accurate marking out are crucial. Pen makers and those who work with small items will readily understand this. Refer to the attached plan for dimensional details. Start with a block of wood 40 mm square by 150 mm long. These dimensions allow for 3 mm wall thickness of the bulbs when hollowed out, and 5 mm waste each end. Rimu is a good medium. The block is split lengthwise down the middle, using a fine blade band saw or other fine saw. Pass the two halves through a thicknesser set to a fine cut, or plane carefully to make a perfect join. Mark the two halves carefully so that when they are re-joined the timber grains will line up accurately and produce a near invisible join.
Next remove two opposite jaws from your standard chuck and insert two slats of timber, each about 75 X 20 X 5 mm, which are used to hold each half of the rattle (one at a time) to avoid marking the surface. Mount the first rattle half in the chuck so that one end is lined up with the outside of the chuck. This will enable one bulb end to be hollowed out. You will be repeating this procedure four times.

Mark the position of the bulb at one end (about 40 mm lengthwise …. see attached plan) approximately 3 mm from the end of the piece and line up the tailstock steb centre with the central point of the bulb to be hollowed, making adjustments by moving the piece in the chuck. When you are satisfied that you have the bulb end centred in the chuck, move the tailstock away and carefully start hollowing the bulb using a 35 mm bowl gouge. Finish with a scraper. Take care to remain within the rattle boundaries and ensure the wall thickness is 3 mm. (Less thickness will be difficult to achieve and more will not allow the bells to rattle freely.) Bruce uses a cardboard template to check shape and dimensions of the hollow.
Repeat this process by moving the rattle to the other end of the chuck, then remove and do the same for the other half piece. You will now be left with two halves hollowed to a bulb shape internally at each end. Now check that the two halves fit together nicely, according to your initial markings. Miniature bells for the rattle can be purchased at most $2 shops and at Spotlight. Insert two little bells in each end bulb and smear a thin layer of glue on each half, taking care to ensure no glue runs inside and glues the bells together! Join and clamp lightly to dry.

When the re-connected block is dry, mark the centre point at each end and mount between centres, using a steb live centre at tailstock end and tooth grip at headstock end. Using the plan detail, mark the position where the bulb piece will be at each end and start turning. Turn to round first, then shape to slightly elliptical as in the plan. The use of an exterior template matching the interior one used in hollowing is advised. Remember that you are turning the outside of a hollow bulb which will finish at only 3 mm thick, so don’t get carried away and finish up punching through the bulb, or you may end up with a fistful of little bells and a seriously munted rattle! Turn the central part of the rattle (the handle) to a diameter of 10 mm so that a small baby can grip it comfortably.
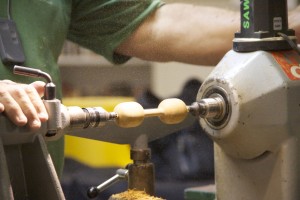
Carry out the final sanding and finishing before removing the rattle from the lathe. Use a parting tool to finish the rattle off at 140 mm, cutting through as far as the outer circumference of the steb centres at each end. Then finish off with a knife and sand off by hand. Remembering that the rattle will inevitably end up in baby’s mouth, final finishing should be done with an innocuous preparation such as canola or rice oil.
Another fine demonstration from the master turner. Many thanks, Bruce, for giving us another idea for gifts and sale items.
Well done to all the Woodworkers that got places in the Easter Show, especially all those from our club.
Results are on the National Association of Woodworkers Website
Date: 18 March 2015
Article by: Cathy Langley
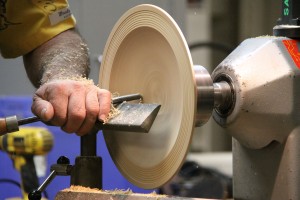
Terry had been asked to demonstrate embellishment of platters. But true to form, he wondered what else we might like to know, and he demonstrated the turning process as well.
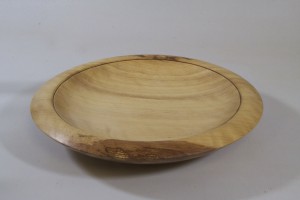
A platter, he explained, is a “shallow vessel to hold food” which (according to Easter Show rules) has a height (including feet) no more than 20% of the diameter.
Terry mounted a 300-mm disk onto a screw chuck dedicated to platters, with a wide plate for the blank to rest against, a long screw, and a disk used as a spacer for smaller platters.
He calls this size a “wedding platter”, large enough to make a statement and small enough for tourists to put in their luggage. His tools were a 35-degree fingernail gouge, a 55-degree bowl gouge, a spindle gouge, and a heavy round-nosed scraper for the final finishing cuts on the inside.
Terry advised against turning a platter with a rim that is flat on both top and bottom, as this is too fragile. Instead, his outside shape was a curve extending from the 75mm foot to the edge of the rim.
That foot was used to mount the platter for turning the interior, intending to turn the foot off later. After leveling the surface, Terry emphasised that most texturing of the rim should be done before hollowing. (An exception: don’t use a leather punch when the platter is still on the chuck!) From a point 1/3 in from the rim and moving toward the outside, he used a rocking motion with his 35-degree gouge to turn a series of beads. He then used a variety of tools and products to demonstrate a range of embellishment options, including random holes (to link the rim to the interior which was naturally embellished with borer holes), his own texturing tool to create a rope-like effect on the beads; leather-working punches; gilder’s paste which can be partially sanded off and re-applied using different colours; and other techniques.
Tips included:
Thanks, Terry, for a comprehensive demo and an easy style that kept us all engaged and offered something to both beginners and experienced turners.
Visit Terry’s Website www.timberly.co.nz to see some of his platters and other work.
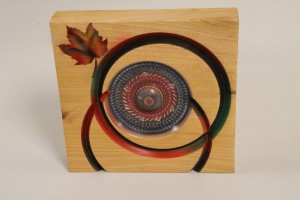
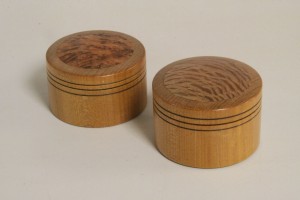
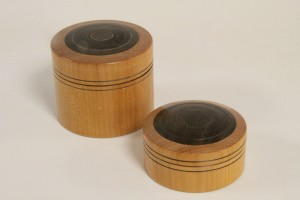
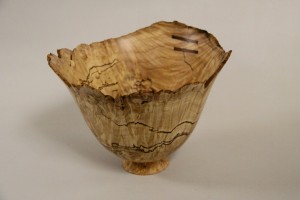
Gordon Ramsey Pembridge Demonstration
11 March 2015
Report by Richard Johnstone
What can one write about after a talk from Gordon. It was interesting, informative and inspiring. There were the usual comical interactions between Terry and Gordon, but these all helped to add colour to the evening.
Gordon discussed with us the concepts of Lift, Flow, Form and Function. During the discussion he pointed out that these were all concepts which we struggled to define. Sometimes they are mutually exclusive.
He also discussed with us the “rule of thirds” and the 1 to 1.16 ratio and had photos to illustrate his points.
Elliptical shapes are pleasing to the eye and give good form.
Designing a turning using a series of ellipses will give a good design.
Two elliptical curves intersecting at right angles give the turning good flow.
Form vs function is always a problem. The form can be perfect, but it still needs to have feet in order to be functional. Small feet cause less disruption to the form of the turning. Gordon illustrated his point by discussing “Terry’s udders called feet” and showing more pictures.
I would need to write a book in order to do justice to this talk. (I will leave that to Gordon) It is suffice to say that it was another great evening of entertainment and information.
Thanks Gordon and also to Bruce for “twisting his arm”.
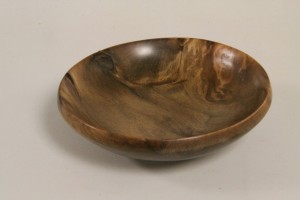
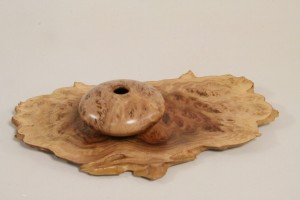
To see Gordon’s work (rather than the poor photo here) check out his web site http://gordonpembridge.com/