Club Meeting: 5 June 2024 Report by: Kieran Fitzgerald
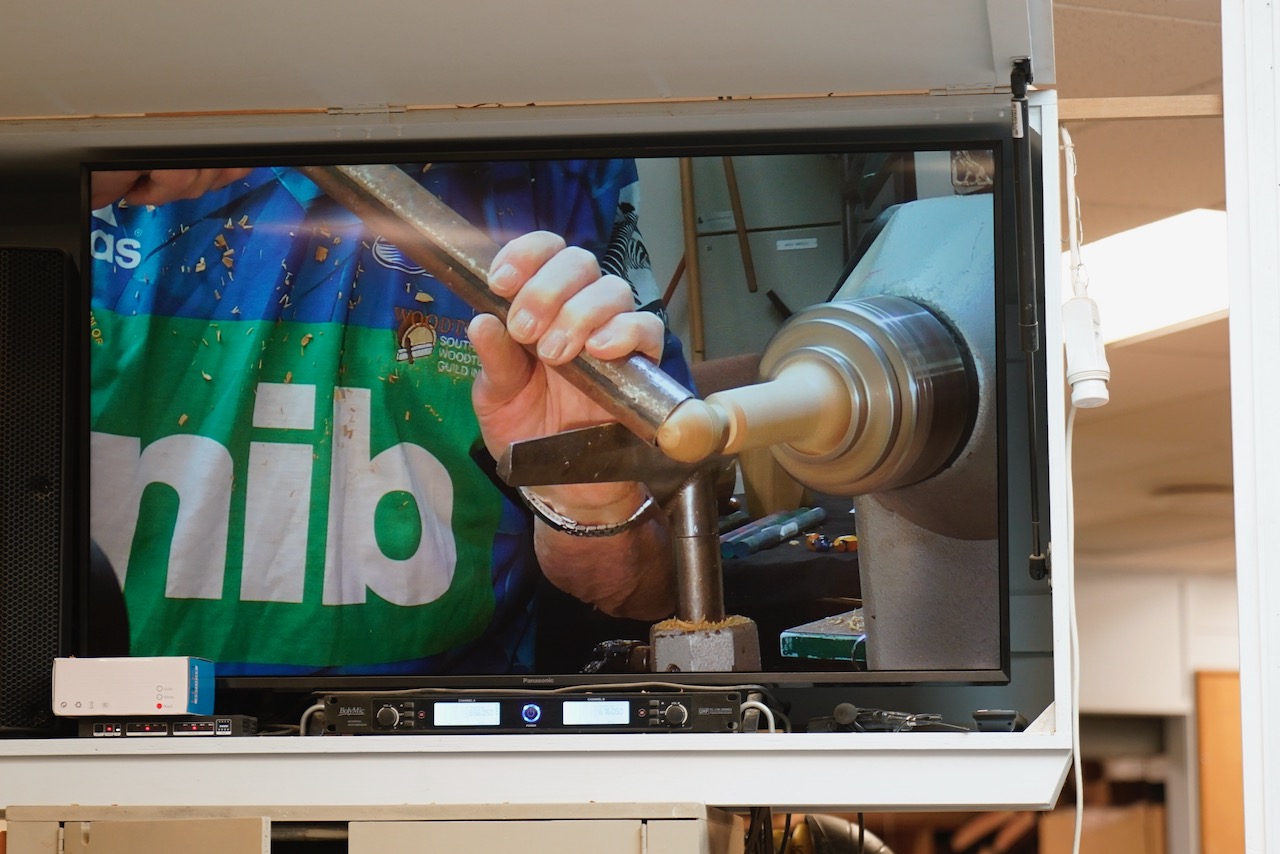
Our demonstrator tonight was Bob Yandell. Bob began with an interesting introduction about the history of the mortar and pestle. These are one of the oldest tools invented by humankind, being in existence since the stone age, so over 10,000 years ago. When it was required to grind or crush seed to make food they used an indented stone as a base, and mallets of stone or wood to process their plants and other foods.
Earlier in the evening, Jim Jackson had shown us a weapon that he was gifted as a child by the Maasai people, and was deployed to bring down a lion. Bob pictured the Maasai using a wooden jar and a pole as a mortar and pestle to crush their grain.
Today the mortar and pestle are typically associated with the pharmacy profession due to their history in preparing medicines. The image of a mortar and pestle would be displayed outside the premises of pharmacy to provide a visual reference for those unable to read. They are used in chemistry to pulverize materials, used in the arts and cosmetics, and of course by chefs in the processing of seasonings.
The mortar is a simple bowl with size determined by the user and the ingredients to be ground or pulverized. It is either held in the palm of the hand or sits on the work bench.
The pestle is a simple mallet that fits inside the mortar and can be easily held in one hand. Early pestles could be up to a metre or more in length requiring two hands to hold.
Bob showed us an example of a stone mortar and pestle used for preparing seasonings. In woodturning the size and shape is a personal choice.
The Pestle
You want a hard wood. Bob’s demo pestle is olive, and he has used pohutukawa in the past. Bob joined the olive to a pohutukawa blank with a glued dowel joint, providing an attractive two tone pestle once turned to shape.
The total starting length of the blank is approx 170mm.
The blank is turned between centers with a 30mm chuck in the headstock and a steb live centre in the tailstock. Initial rounding is achieved with the spindle roughing gouge and final shape is created using skew and spindle gouges. The olive end is rounded to 25 – 28mm with a profile not to dissimilar to that of the end of the steel rules used in the club. The end is sanded smooth. The handle end reduces to 20mm, with an overall length of 95 – 100mm.
The hand end of the pestle can be a personal choice based on looks and comfort, and the grinding end should be a “fit” with the internal shape of the mortar.
The Mortar
The key elements of this simple bowl that make it suitable for a mortar are as follows:
It can be held in the palm of the hand or be stable on the bench.
It is deep enough
It has a slightly concave inside wall and a curved base/floor to retain and grind the product being processed
The wall thickness, at least 10mm, is such that it can survive the pulverizing action
The bowl material needs to be of a hard wood. Bob used olive. Pohutukawa is also suitable. Puriri is not suitable as the colour, yellow, will taint the product being processed.
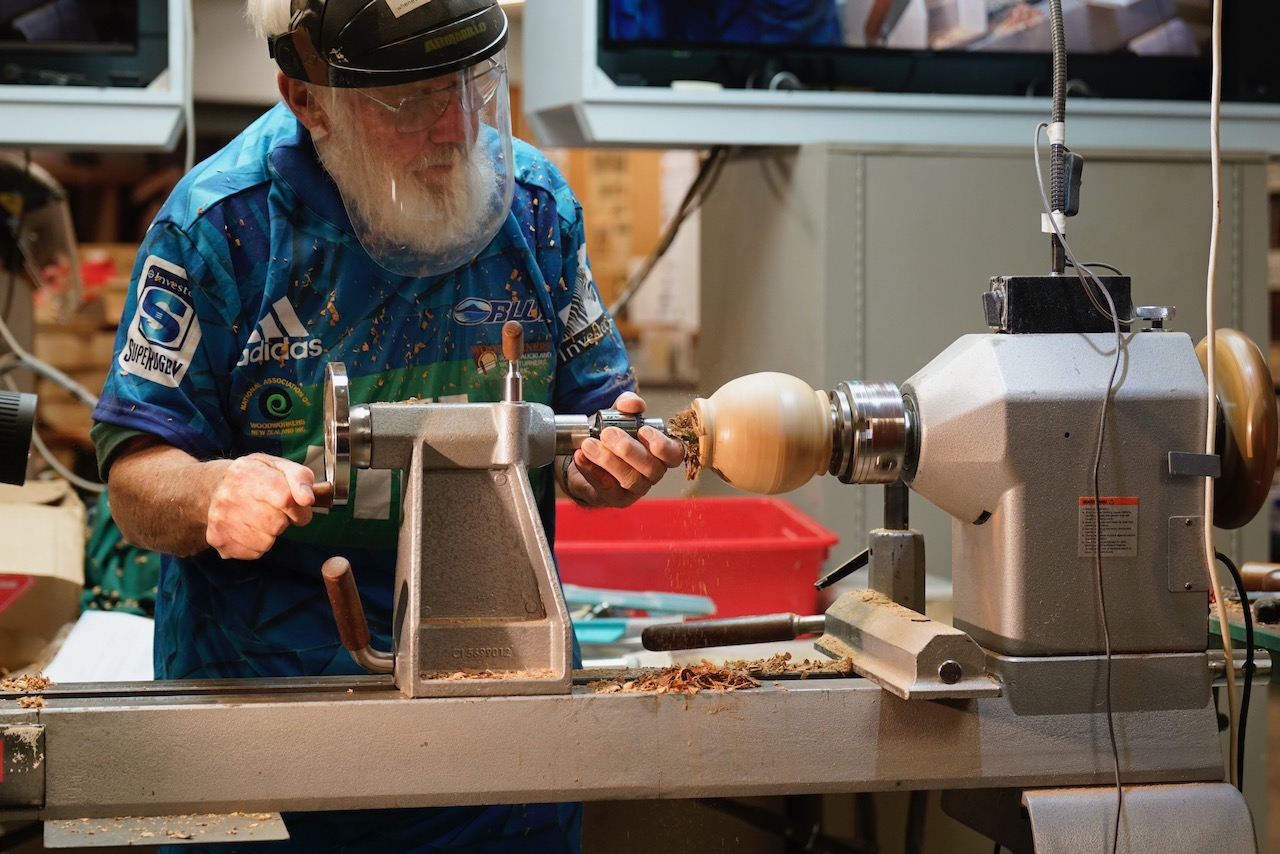
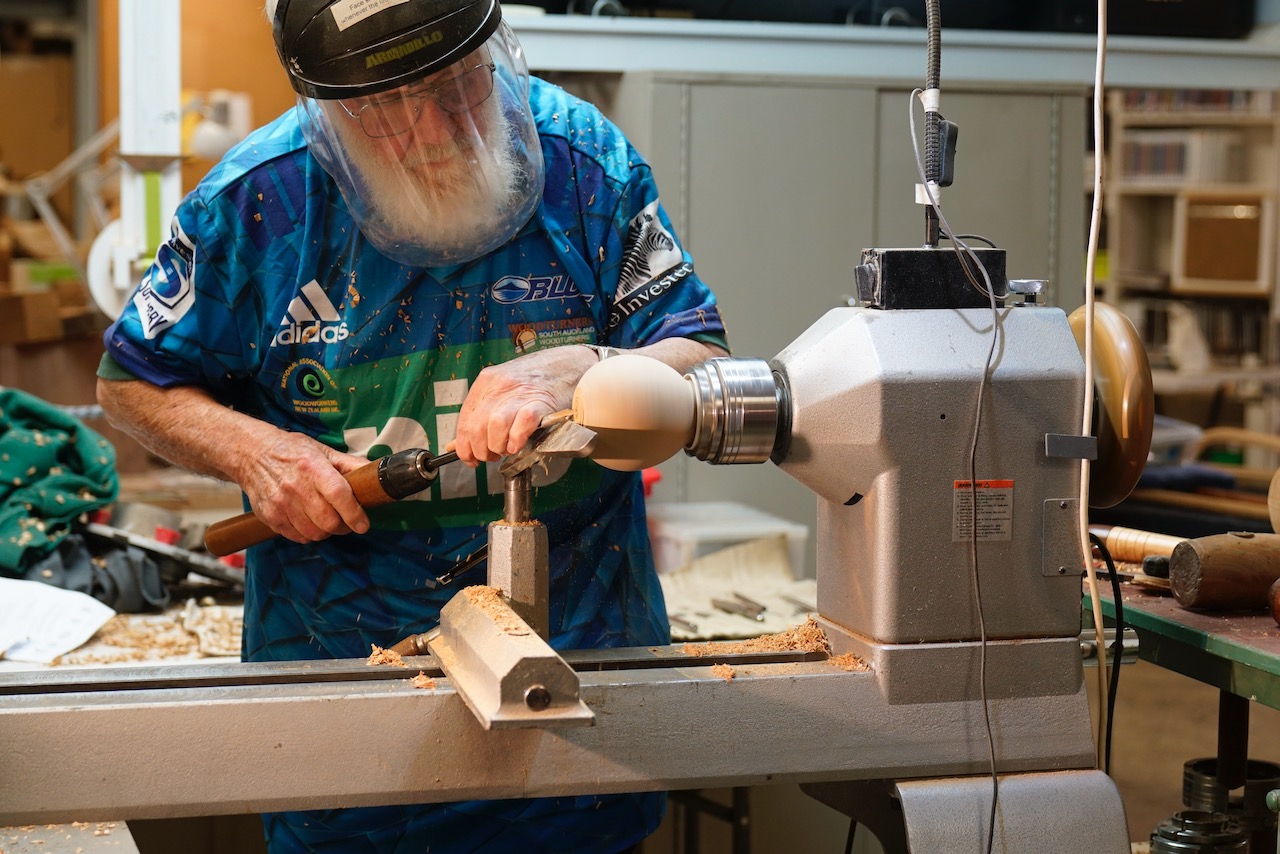
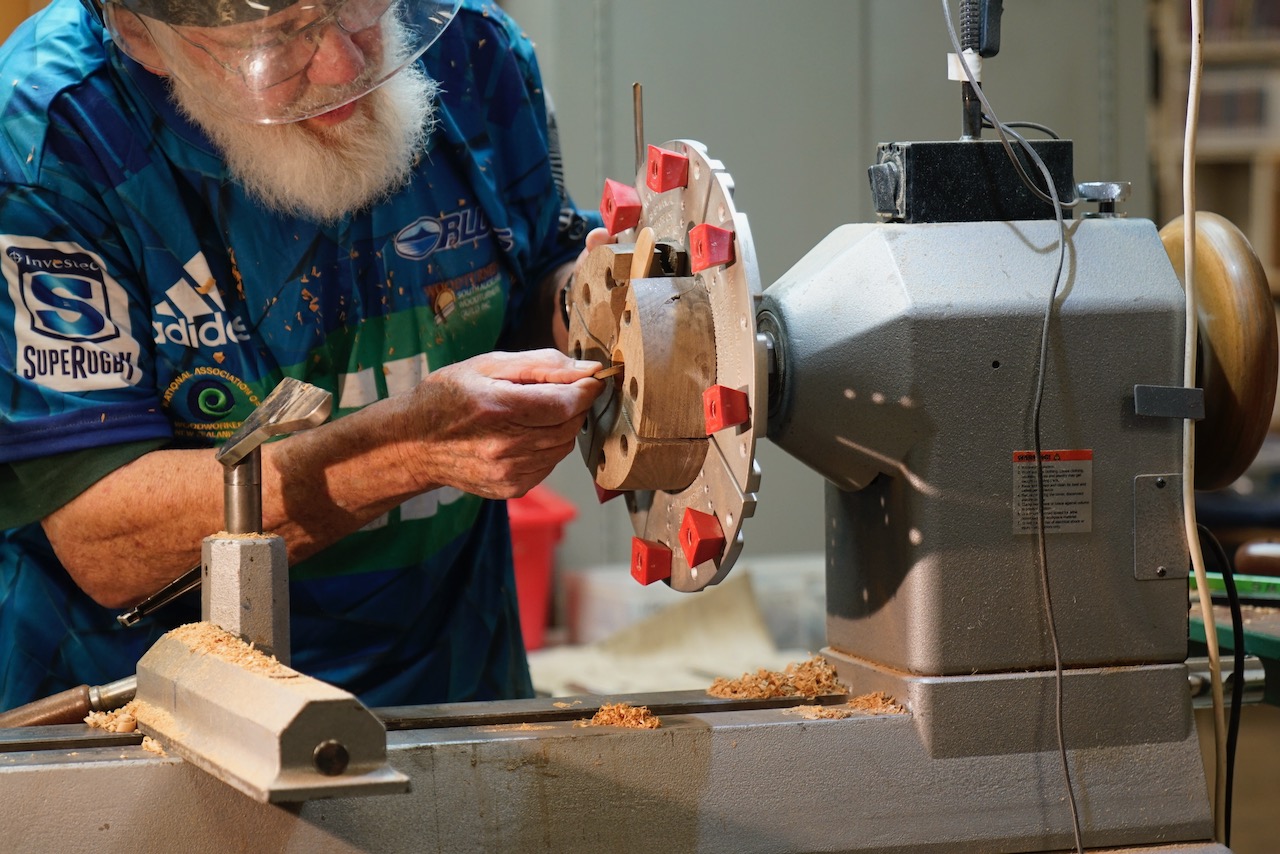
The blank is 95 x 75 and mounted using a screw chuck. The spigot is 46mm x 8mm and will be turned off when the inside is complete. The external curve of the bowl is hand friendly. Remember to indicate the centre of the spigot to ease alignment for removal of the spigot.
Remount on the spigot and hollow. Wall thickness is 10mm and a slight undercut inside wall. As when turning a hollow form the shavings are caught up inside and this is what you want to happen to the product being ground/crushed. The profile of the internal base should allow even contact with the pestle. A heavy bottom is desirable.
The inside bottom of the mortar needs to have some roughness to grind herbs and spices against, so 80 grit sandpaper will suffice.
The mortar can be mounted to allow the spigot to be removed: Against a faceplate Using a vacuum chuck Using the 50mm chuck in expansion if it suits.
Our thanks to Bob for demonstrating this utilitarian tool which should be both a useful and attractive adornment in every kitchen.
Garry started by talking about the masking tape he was using – a thin tape used by car painters etc for laying out graphics. It allowed you to get nice flowing curved lines. The tape he was using was source from Glue Guru in Penrose.
One he had the basic layout with the thin tape he then used thicker masking tape to block out the areas he wanted to protect on the work.
He had a number of different paints and other tools that he was using
Jacquard airbrush color – source spotlight
Jo Sonjas iridescent paint – source Hobbyland
Gilders Paste – Timberly
Gilding Wax – Woodgrain NZ
Burrs for high speed carver – Timberly, Carbatec, ‘shop at 15 Trugood Drive’
Brushes for rotary tool – Temu
With his design Garry works on creating movement, also planning to disguise faults or cracks in the wood. Best to allow your design to work with the grain.
Garry then proceeded to mask an area on the piece. First process was to frame the area with a groove cut with a burr.
Next he used tape to mark out lines on the wood as a guide for the texturing that followed. Taking care not to leave too many flats of uncut wood.
Then once he was happy with the texture he sprayed the piece with flat black duramax paint (Bunnings). Then gilders wax was applied.
There was another piece that was also featured during the night, it went through the same processes up until the last step when Garry used the Jo Sonja’s Iridescent paints. These were applied to the same black background of duramax. These paints all look white until they are applied over the black. Only a small amount of paint was needed. Clearly Garry had a good understanding of how to blend these colours even when there was no visible difference until they were appied.
A very informative and interactive demo even when Garry had stepped in at short notice. Thanks Garry.
The Demonstrator provided the Ideal story theme: Odell’s cousins and family. An entertaining lead into the demonstration. The story of each individual providing the substance for the project and development of an art piece for the family and its extensions.
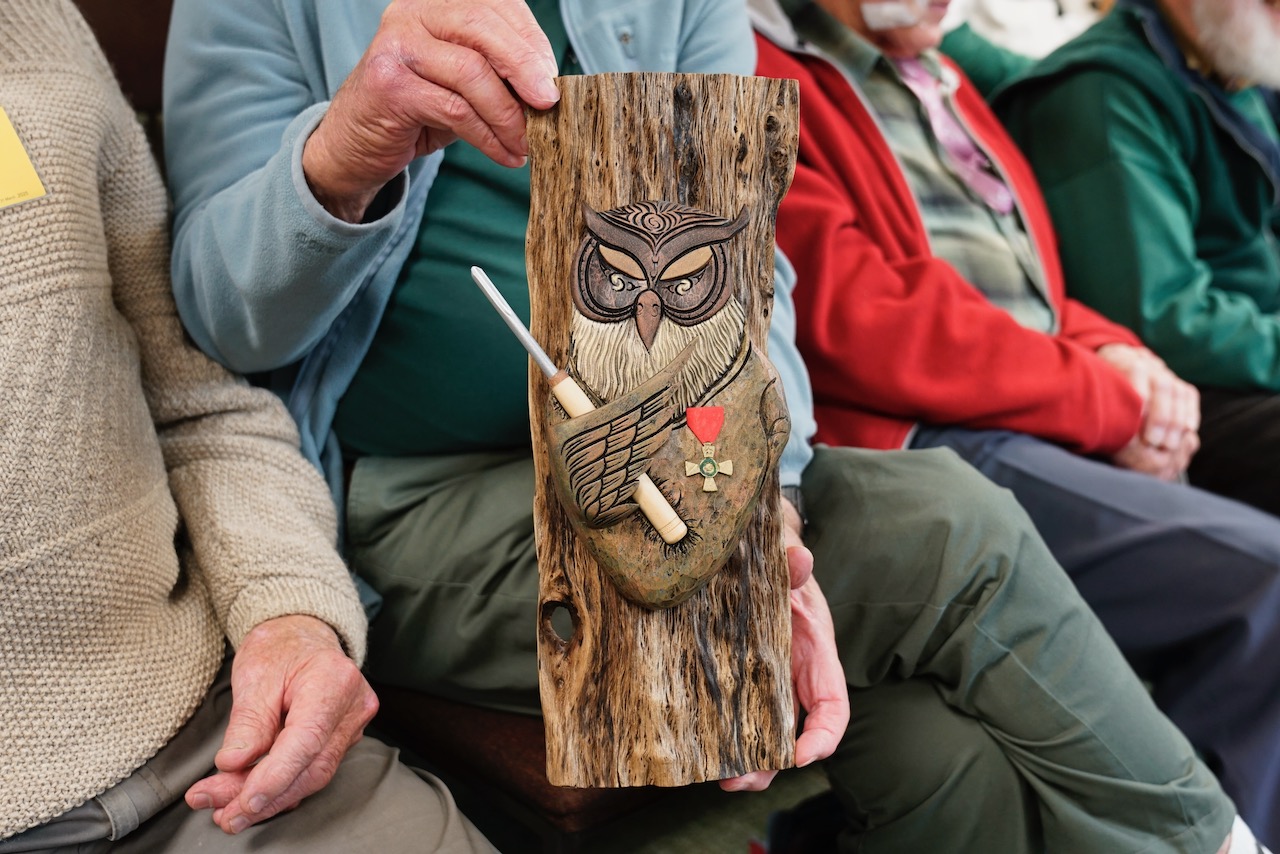
Each individual story was carried by a type of Owl I.E. Barn Owl. Each bird will depict a specific person or family member and their perceived main activities. All individual birds represent a person’s strongest features.
Key questions raised were. “What do your cousins do.” “What is their primary and visible activity.” “What type of carving to show this activity.” The types, sizes and shapes of the owl define the story.
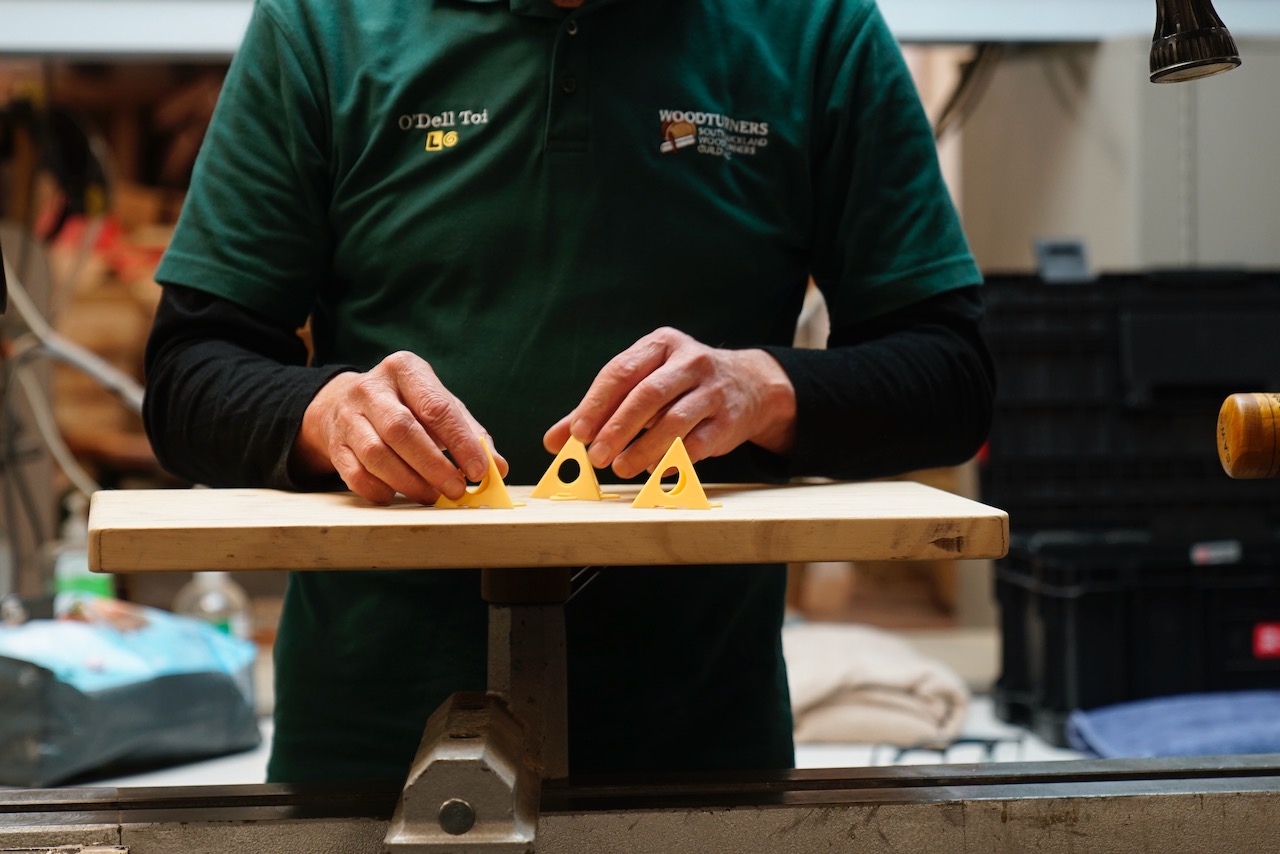
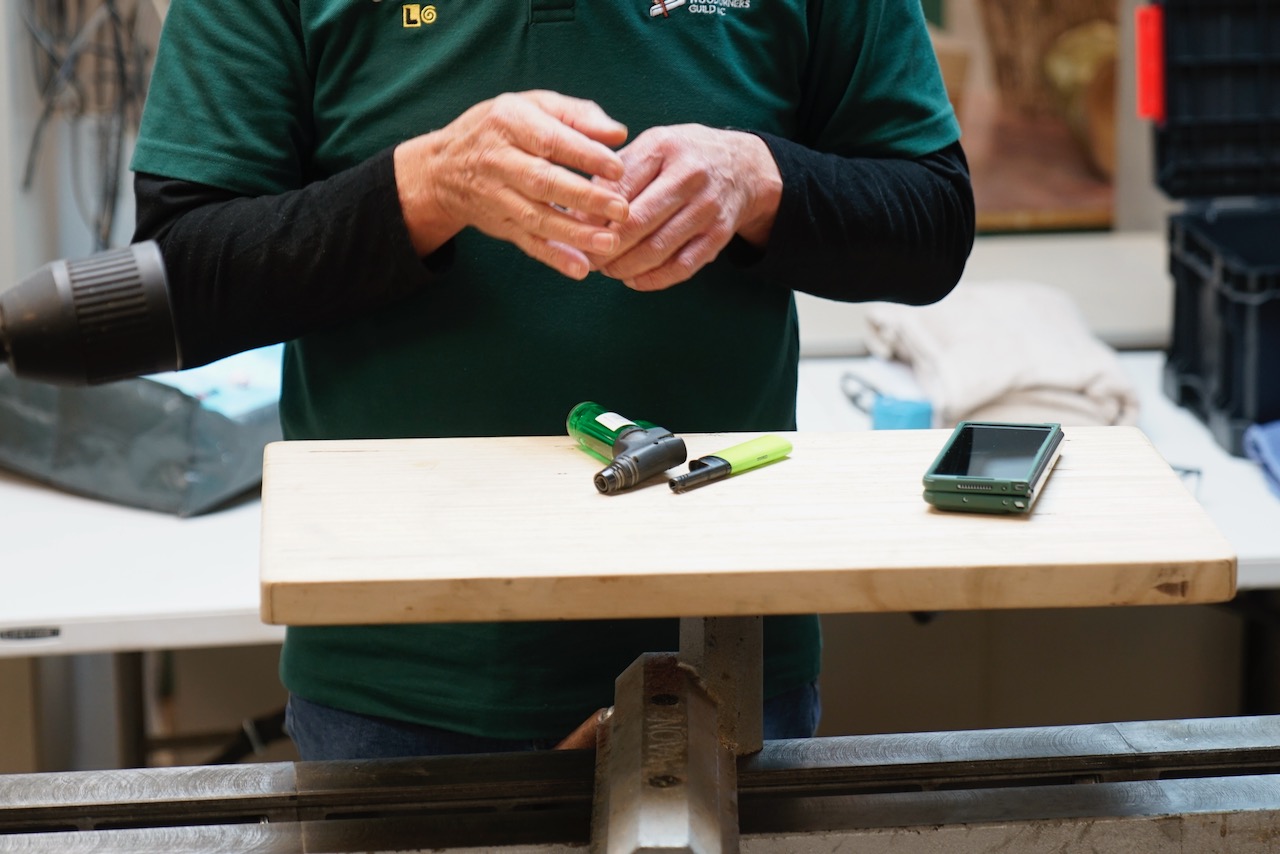
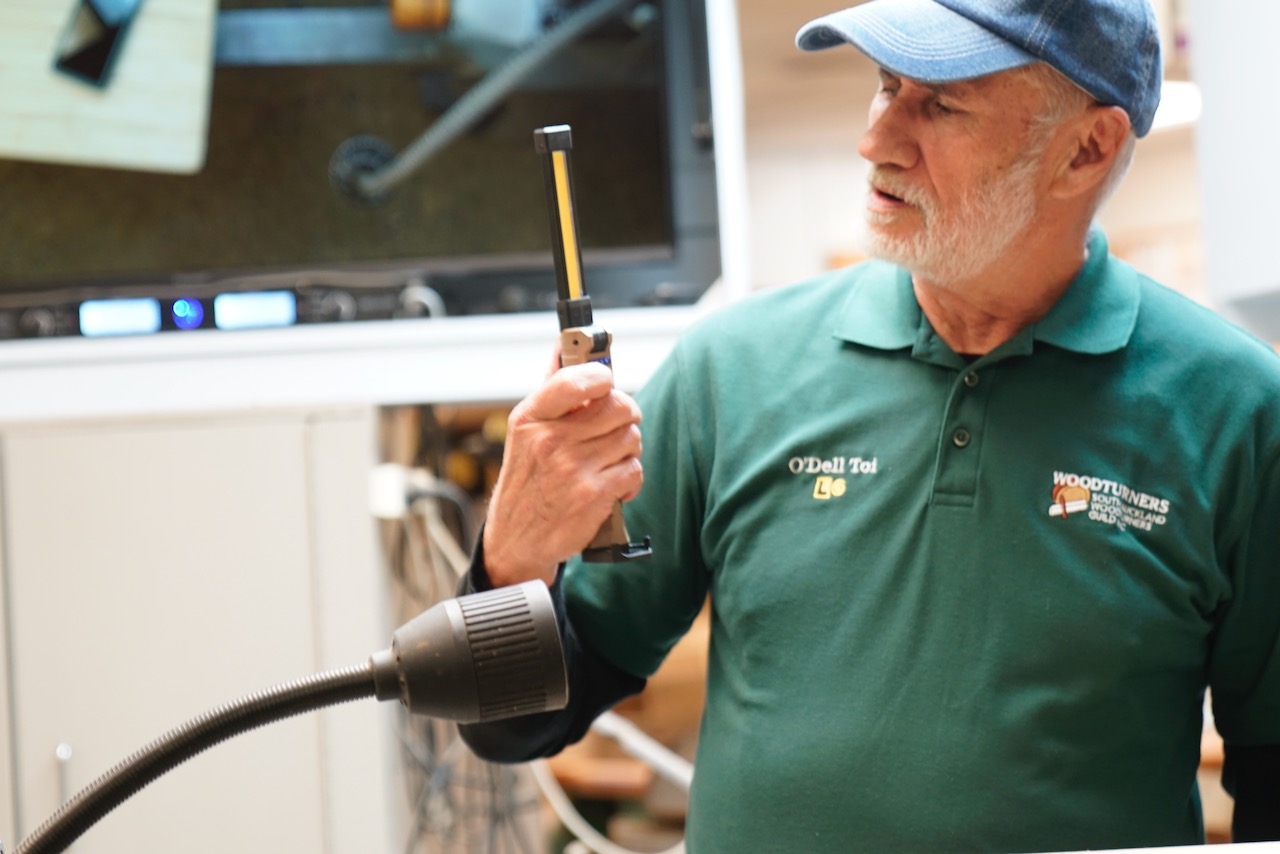
The many uses: discussion moved to how things, items and common material can be used to assist the construction and fitting process. Odell’s magic box bought out a whole range of very common items that can be used in other ways i.e., painting pyramids to hold things up. Old paint loads for use as a backdrop and used as mini containers. Lighters to make limited and restricted heat sources. Lighters to use for burning and sealing ends of lashings, necklaces, and jewelry fittings. More came out of the special box; lamps using USB chargers.
Then various jigs came out. All had specialty uses that can be made into additional applications. An interesting reminder that old chisels can be reused and reshaped to bring a range of embellishments and patterns to an object or project.
Special “Owl” demonstration: The special demonstration project was directed towards the story of a well-known person and their strong and invisible features. Further, the project Owl was designed for a specific competition. Odell outlined the story that directed the carving and explained about the project process produced a continuous flow of spirit and awareness. All within the watchful eye of the specified Owl.
All the key features of the person were viewed with a discussion about their carving embellishments and adaptations. There was a range of considerations such as planning the individual colours used. Each colour covered part of the story. The direction of each individual colour or set produced a different change in the embellishment provided for each section.
Amongst this process came practical examples and ways of getting a project going. All very simple. A useful example was keeping the paint and/or embellishment material from the same brand. Avoid unnecessary conflicts.
All the pieces: ODell emphasised the planning and working out the structural and strengths requirements of the individual parts and overall. Specialist fittings have to be checked. Thought needs to be given to the construction process. What parts need strengthening? What is the size of embellishments and specialist fittings?
All part of a story’s progress and process. Considering design features to identify the target story’s positive features. All are part of the process. All coming down to design.
Addendum
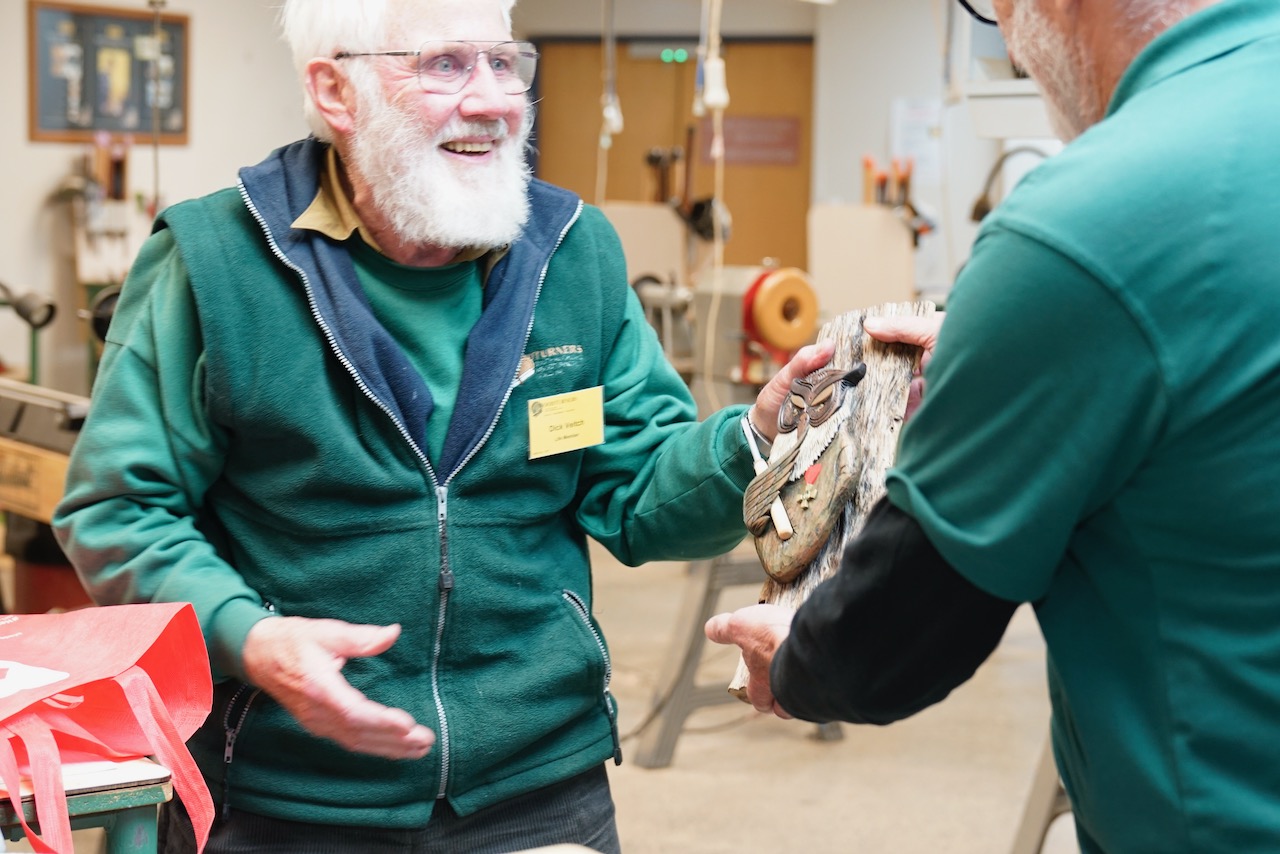
On the 29 May 2024 O’Dell presented Dick Veitch with the Owl that had been developed as a proof of concept of the Cussies theme.
Club Meeting: 15 May 2024 Report by: Ian Connelly Photos: John Osbourne
Started with a block of Kauri (Looked about 125mm square)
Mounted between steb centres, with grain running along the bed of the lathe (spindle turning)
Rounded with a Spindle Roughing Gouge.
Used a parting tool to put a chuck bite on the bottom.
Mounted in 50mm jaws on the chuck.
Started shaping – pointed out not to make the top end too small as this needed a good opening to access the salt.
Dick then shaped the “pig nose” down to 65mm.
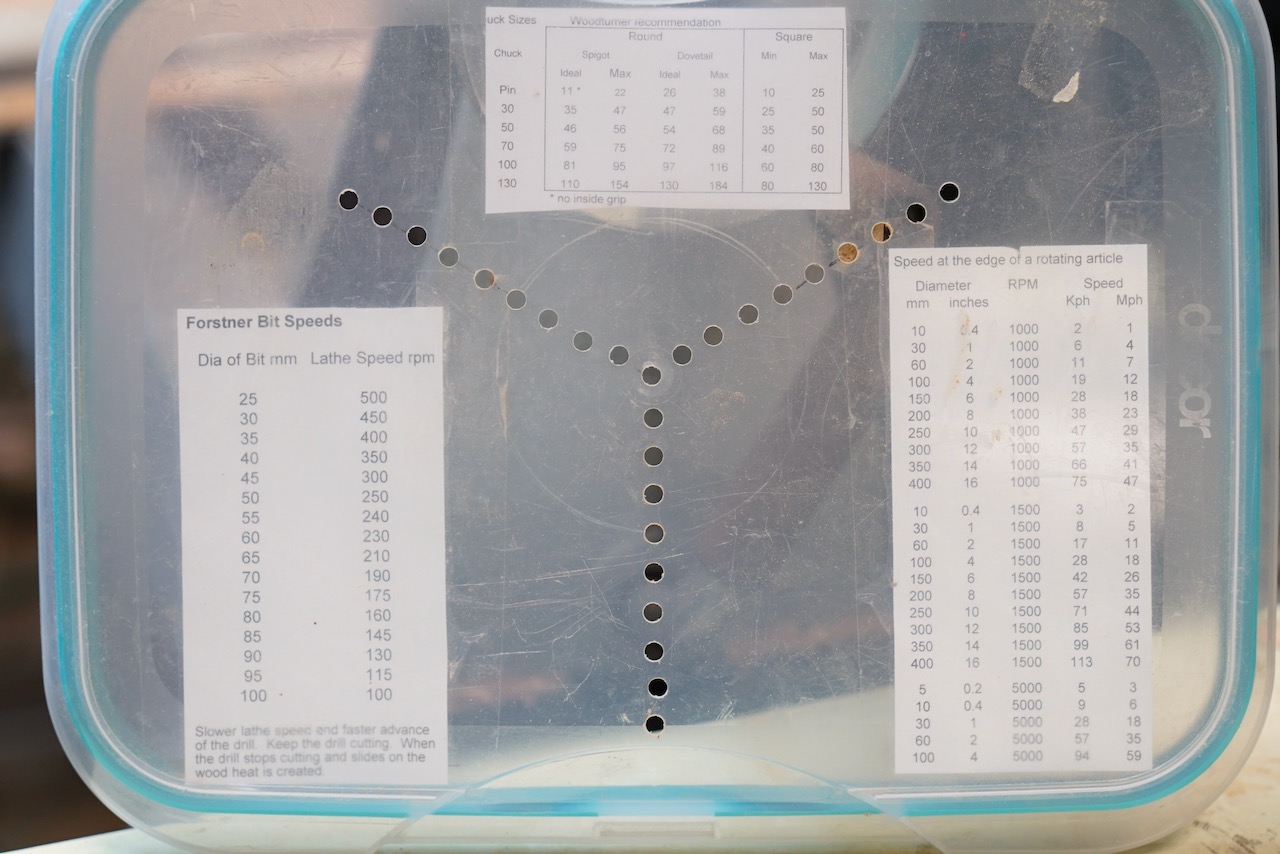
Started the hollowing process with a forstner bit, running at 350rpm, keep it cutting, slow speed to minimise heat.
Hollowing then continued with a bowl gouge, and a munro hollower (which did not co-operate, resulting in magic box).
Reversed the salt pig into 70mm jaws, with some plastic drain pipe that had been spilt to protect the wood.
Finished the bottom of the pig with a slightly concave base.
Next step is to take it to a sander and put a flat on a side to allow it to sit at and angle.
Some discussion about having two bases followed, and Dick’s answer was that vertically it is easier to fill, and on an angle it is easier to spoon the salt out.
Spoon
Mount blank in 50mm jaws with tail stock support.
Round with Spindle Roughing Gouge to 30mm diameter.
Make a ball on one end, this process was assisted by a piece of pipe.
Sand the outside
Shape the handle
Cut in half on a bandsaw – the square end that was in the chuck provides the support needed to do this.
Shape the handle further with the sander/bandsaw.
Dick then got out a jig that he had made to hold the spoon for hollowing that was mounted on a set of cole jaws
Another great demo from Dick, with an answer for every question that was thrown at him.
Rocky started the evening by explaining that the origins of epoxy resins were linked to the dental industry. This set the tone for a very informative evening.
His main source of epoxy was Liquid Polymer Glass deep pour with a ratio of 2:1. He also used their Knot Filler resin for thin flood coats over the wood and resin. Here he highlighted the importance of checking the ratio of the resin you are using, as getting it wrong can have dire effects. He used a measuring cup from aliexpress that had various ratios on the side of the cup as well as indicators for different quanities. This works for resins designed to be mixed by volume, rather than by weight.
He then showed us an example board that took about 2 litres of resin.
Options suggested for colouring resin
Mica Powder
Metallic Powder
Alcohol based inks
Acrylic paint
Gel Colourant
With the slow deep pour resin Rocky had found he could mix the resin, wait an hour for the bubbles to rise, then pop them with a flame. He would then pour a thin stream into the mold to minimise the addition of further air to the mix.
When Rocky start his journey into epoxy resins he made home made molds, but found this too risky as the resin would find the smallest pinhole to escape. He then moved to using commercial molds, silicone molds which the resin releases from quite easily, although the use of a mold release product improves the lifetime of the mold and reduces the likelihood of tearing the silicone. The other molds he has are made from hdpe, and have draft on the side (an angle) that allows them to release with a twist and a tap on the bench.
Other topics covered included
Use of a spirit level to make sure the mold was level before a pour.
A cardboard box over the item to prevent dust (especially for items that received a flood coat).
Painters cones to raise the board when flood coating, to it does not stick to the workbench.
Having some small items to pour was also suggested to minimise waste of resin, Rocky makes handles for ice cream scoops
Wood should be dry – Rocky suggests 10-12% moisture max before using with resin
Another thing that was noted is that Rocky left the ice cram scoops for 2 weeks after pouring before he would attempt to turn them.
It was a very informative night, and if somehow people failed to learn something from Rocky then they must have been sleeping.
A journey towards a multicentred, twisted plane, three sided vase based on the development by Barbara Dill. Andrew discussed the production passage and how things were achieved. Also, discussing the integration of trade apprenticeships and metal work and the development of production turning in engineering.
The overall aim was multi-centred bowls, twisted access of multiple sizes. In this demo, three sided goblet using this technique. Andrew’s long-term goal was to develop a method to make equal and exact multiples using an interesting and wide-ranging approach based on jigs, jams, and their application to fabrication of wooden lathe turned objects.
Andrew discussed the effect hours of design work for his movement into prop work and construction in TV film and theatre. The skill set devised in the making props for film production sets made a contribution towards his turning. Assisted by the subsequent movement through the NAW courses including training and colouring by Emma Rees Jones. Again further exacerbated by sides into carving and the techniques of working with Styrofoam. Also noting Has enjoyment of seeing it applied to the world of wood.
The project: A multicentred centred twisted format goblet based on the Barbara Dill premise. There is a project sheet available from www.sawg.org.nz: Triangular Vase. The sheet provides dimensions project outlines the starting point that to exercise on this style of vessel. There is an outline in the SAWG project section provided critical starting measurements. And, often as usual, importantly, the set of measurements that need to be organised and undertake the appropriate order for the establishment of centres-in this case sets of three.
Andrew stressed that the key is the setting out of the centrelines. The establishment of the axis turning points in the final shape are defined by the height and centre point diameters. The SAWG project sheet covers this quite clearly.
Interesting set of approaches was provided by the placement of the axis centre circle points to find the parameters and the ensuing shape. These measurement ratios and features provide rotation of the parallel sides in the movement of the curve to the next turning position. Each section is a repeat of the previous and with the precision of each section defining the size and form of the final piece.
The amount of twist is defined by the offset of the parallel sides and the planned shifting centre marked point. This demo Andrew three setpoints, hundred and 20° separate on a in a circle around 15 mm diameter. Still stuck on the measurements, try the SAWG project
Andrew stressed that this is not a major volume job. Fun can be had by changing the position of the axis centre points that will allow maintenance of angle and allow shape change. The working of these features into specialised jigs provides visual presence of the new shape. The setting of the jig curve provides a visual of the final shape. The construction the jigs is another item.
Standard process: Hollowing for the goblet was standard, a small spigot for the chuck, guide hole for the forstner bit. Many little tips turned up: A round ended drill bit was used to finish the base within the confines of the three sided, twisted, goblet.
Concern given to the direction of cutting. Andrew stresses that the direction of cutting is critical to the finished product. “Same cutting direction for each side.” And finally: “each little bit counts.”
Club Meeting: 3rd April 2024 Report by: Bob Yandell
The ‘More Jigs’ demonstration stems off the back of the demo which Jon did last year where he demonstrated a threading jig which he built. In tonight’s demo Jon demonstrates three more jigs which he designed and built to assist in his journey as a woodturner.
Having an engineering background the jigs were well thought through and constructed. Whilst some of the jigs will be beyond the skill set of members to replicate, the principles of each jig demonstrated are useful for the viewers.
Jon stated that he was in a predicament. He volunteered to do the demo last year as he had built some of the jigs. But all demo nights were full so he was given tonight’s date. He was unaware of the ‘Art Deco’ term theme until this year, and none of his tools or jigs are built in an art deco style. He apologised to the audience and said that unfortunately he will be keeping art deco to a minimum in this demo.
Spigot/tenon marking
Jon first highlights the issues (and limitations) of tenon marking using calipers, as taught in the Introductory Course. This includes the potential of the right hand leg touching/catching the spinning wood, which could pull the calipers out of your hand. That can be quite scary for new turners. Also, trying to mark a tenon when the tailstock is up is always challenging.
Jon then showed his homemade tenon marker. The jig was made from aluminum but it can be made from anything that is of hard material. This could be things like industrial formica or some hard timber such as a piece of kwila decking. There are two tenon markers on the jig, one for 50mm jaws and the other for 100mm jaws. Each marker has two pins, one sharpened to a point which engages with the centre of the work piece, and the other shaped like a vertical line which does the actual tenon marking. Jon used 2mm drill bits for the pins as these are high speed steel and they will last a long time.
He demonstrated the jig on a bowl painted by his daughter Nikita. To define the tenon on a bowl blank you must first mark the center of the base. This is achieved by either using the point of the skew or by bringing up the tailstock and making a dimple with the live centre. Jon then proceeds to mark tenons for 50mm and 100mm jaws on the workpiece But wait! That was a bit too easy. Any homemade jig could be used to easily mark a tenon when the tailstock is out of the way. But what happens if the tailstock is up and it cannot be removed, like when turning between centres? Well Jon has built-in a solution for that. Jon has strategically placed the 50mm pins in specific positions. The marking pin is a certain distance from the edge of the jig. Jon explains that the jig can be held flush on the side of the tailstock quill, and a spindle can be marked very easily with the tailstock engaged on the workpiece. He shows the process and the tenon marking is bang on size.
Lastly Jon shows a method of tenon marking which is by far the easiest and you don’t even have to build a jig. By simply shaping the point of a flat pencil (similar to what we have on our lathes), so that the lead is a little offset, the pencil can be used in the same way as the jig (held against the side of the tailstock quill), to mark a tenon. Again the size is measured and it is bang on.
Fluting jig
The starting point is the installation of a table on the bed of the lathe for the fluting jig to slide on. The table was 18mm MDF but similarity stable and flat material would work. Jon had secured a steel plate the width of the gap on the bed to which he had locking latches at each end. These are designed to be tightened from the top with countersunk bolts and no spanners or sockets are required to be held underneath.
Jon then installed an indexing system onto the lathe. The indexing system consists of an indexing plate and a selector arm. The indexing plate has a number of holes in concentric rings around the plate. Each ring of holes allows for numerous indexing configurations. There are over 1300 holes in the indexing plate, which took three days to make. Because of the flush headstock bearing design of the Nova lathe, he placed a 1mm washer between the indexing plate and the bearing on the headstock. This stops the indexing plate from binding on the bearing.
The chuck, 50mm, was then installed and tightened to lock the indexing plate in place. The demo wood was mounted and the power to the lathe was turned off, for safety reasons. The indexing selector arm was also installed.
The fluting jig was designed from the Paul Howard fluting jig. Jon designed and built a frame to support and allow vertical positioning of a trim router. The base is made from 10mm thick plate which minimises the jig from tipping. There is also a Polyethylene (PE) base underneath the steel plate to allow easy movement without resistanc
In the demo Jon showed two types of fluting processes. First he used a ½” cove router bit and cut flutes around the outside of a bowl. Because of the shape of the bowl, the flutes start deep on the top edge then fade out down the side of the bowl for a pleasing effect. The number of flutes was calculated by dividing the size of the router bit into the circumference of the bowl. This gives the number of flutes side by side, but in the demo
Jon indexed the workpiece so that the flutes were spaced out with a ½” gap between the flutes. There are many different combinations so it is up to the person doing the fluting to do what they want for their particular workpiece.
The depths of the flutes were controlled by mounting a fence to the table. Then Jon used thin metal rulers as spacers between the jig and the fence so that the full depth of the flutes can be cut in several passes by removing one ruler at a time. This reduces tear out and burning of the workpiece.
For the second type of fluting Jon removed the top part of the jig from the heavy base and fitted it to a hinge base that he built. The hinge base allows for arc cuts across the rim of a bowl. For this operation the jig is clamped in position parallel to the bed. Jon had pre-turned a sample workpiece where he cut 4mm grooves into the underside of a wide rimmed bowl. A 6mm straight router bit was installed into the router and
Jon demonstrated cutting arc style flutes in the top of the rim. This produces a lattice type effect. In the style of Dick Veitch magic, Jon pulled pre-turned finished samples of both the outside fluting and the lattice work out of a box so that they could be handed around. This demo showed two ways to flute with the jig, but if you use your imagination, there is so much more that can be done with the fluting jig.
Bowl from a board jig
Commonly referred to as a ‘band saw bowl’, making bowls from flat boards is a great way to use thin boards that you would otherwise not use. Rings are cut from the board and glued together into the shape of a bowl. This demo required a board that is flat. A waste block is attached to the center of the board and a tenon is cut into the waste block so it can be mounted into a chuck.
Jon has built a jig for cutting the rings from a flat board. Unlike a band saw bowl, the rings are cut out in one complete piece and there is no cut in the ring. There are three parts to the jig, the tool rest, the parting tool and the angle blocks. The tool rest fits into the banjo. It has been designed to hold the blade on the parting tool straight so that parting can be completed accurately at a specific angle. The parting tool was homemade from a thin parting blade from an engineers lathe. The angle blocks are used to set the desired angles when parting. There are five angles that can be used – 35, 40, 45, 55 and 60 degrees.
In this demo Jon used 40, 45 and 55 degrees for the cuts. A line is marked in from the edge of the board by the thickness of the board. So if the board is 18mm thick, the line is 18mm in from the edge. The parting tool is set to 40 degrees and the first ring is cut. It is important to not push the tool hard and to go slowly when you start to cut through to the other side. This reduces tear out. Once the ring is cut it detaches from the board and spins around on the chuck so you have to be quick on the stop button on the lathe. The ring cannot come off so the chuck is removed from the lathe to release the rin
To work out the position for the second cut the inside of the first ring is measured and then drawn onto the remaining of the board. This time the parting tool is set to 45 degrees and the second ring is cut. The same process is used to work out the position of the third cut. This time the parting tool is set to 55 degrees and the ring is cut.
There are four pieces in total, 3 rings and the rest of the board which is still mounted in the chuck. The rings are then stacked on top of each other to form a bowl shape. Because Jon used different angles, a natural “curve” of the bowl can be seen. This also provides more wood material for further shaping when the bowl is turned. The rings are glued together, and once dry, the final bow can be finish turned.
Jon showed some finished items and explains why he used the different angles. In layman’s terms he used CAD (cardboard aided design) on the white board to show how the different angles work with each other to provide the natural bowl shape. He also showed a CAD model where all of the rings are cut to 40 degrees. This results in a bowl with straight sides which looks a lot like something from the art deco era. With that Jon pulls another finished item from the box and says, “Ladies and gentlemen, a bowl from a board in the style of art deco”.
Most of Jon’s jigs including the threading jig can be seen on his YouTube channel. Go to YouTube and search for The Hobby Machinist NZ.
Club Meeting: 20 March 2024 Report by Graema Mackay
Trefor and Terry Scott discussed approaches to starting on, looking into and working river and beach rolled burls. The discussion had present a range of sizes, weights, densities, shapes, and variegated holes. The emphasis on individual view and making decisions on what the approach will be and the type of system.
An open discussion from opposing angles of viewing. There was a discussion movement away from the traditional multi-center bowl and moved to and opinion through to generation and development of art things, sculptures, and integration into other media.
The traditional: Keeping it natural. Using the surface. Keeping the surface as it is. Making a considered attempt to keep the shape. Different applications and holding techniques i.e., hot melt glue. Counterweights in traditional application.
Changes: Using balance to apply a different place/change to the piece. Working on the form of the piece. Frames and borders. Using the original shape/surface. Re-looking at the surface and what can be done with it.
A wider view: Looking at the history of the wood. Story of the piece and how it got there. Picking a piece to show the story. A new view and new center. Presenting another way.
Individual aspects: Open to options. Open to different cutting systems. Open to new applications/different applications. Improving skill sets.
Most importantly: working on a range of views and approaches, trying different ways, and sharing knowledge.
Club Meeting: 20 March 2024 Report by: Graeme Mackay
The Trefor choice was taking a safe approach and keeping the goal of “what is being made,” an initial secret. Well, as secret as one can make it.
There were several pieces under the magic blankets and covers. Start being to keep up interest and putting pieces and places to hide things. However, there was a very standard opening for a practical Lathe worked piece set between centers and made roughly round-using a Skew of course.
As always, the Teacher. Trevor noted that the object of the exercise was to promote tool techniques and ensure that “everything lined up.”
Rebates and coves started shaping things up as did the Jacobs chuck, changing structurally inner with a 40 MM hole in the center. A short tube turned to equal thickness was some cleaning up. Then some simple grinding work, and sanding to turn a small cup into a small salt spoon.
The practicality moved on to small Spatulas. Wood Sof course These units were produced using standard techniques, cuts, and correct techniques. Trefor mentioned to remember your teachings and start cutting from the tailstock rather than the drive end. Also, that pre-prep saved “a lot of energy” and kept a person on track. In this case the Demonstrator.
Again, simple straightforward way of holding a flat narrow piece on the chuck and, care taken choosing the correct. Then, shaping the shoulder and coving the handle, while not being to be too clever.
And, of course, ensuring that the handle is able to take the appropriate load of tailstock pressure being used in the preparation.
The oops highlighting this load carrying issue. Summarised in the phrase: thickness versus strength.
Forward in cheerfulness, standard traditional Woodturning and a very practical result.
Club Meeting: 8 March 2024 Report by: Graeme Mackay
Style developed in the 1920s appears in a wide range of forms with each country or region is putting forward their own version or direction. The style allows a full range of work and material. In this case, individual artists or institutions using wood or associated materials.
The individual contribution in this instance was based on using a series of wood or MDF jigs to make a vase in the style of Art Deco. A seemingly simple object the complex base formed on jigs.
As with many simple projects, there is an extensive amount of accurate and well measured preparation. The seven layers require a very distinct set of jigs plus guide for foot hold shaping jigs and alignment pegs.
The visual show layers are matching with differing diameters and differing jigs. A central core – again with a different diameter and its own shaping jigs form the base. Along with this central piece are two Dowel shaped feet (30 mm diameter) with their own construction method.
The shaping system is a series of specialist jigs that is centred on alignment pegs. These pegs appear in key positions making the alignment of the jig system relatively simple (?) and straightforward in application.
The Assembly: the accumulation of pieces produced through jigs is a straightforward come together and a standard gluing process using the alignment pegs. A process that the Demonstrator calls a common engineering process or in short; “simple”.
Tools: There is a small range of tools and materials that are required: Drill press, power drill, bandsaw large, spindle moulder, spindle sander, Brad point bits, Forstner bits, sanding blocks, lathe, Dowling production jaws, drum sander, trimming saw, undercoat, spray can, finishing paint. And timber for individual layers, base form, Dowling, jigs, sacrificial jig timbers, pegs, and bits.
A fun demonstration to watch: The individual layers and pieces coming together make an art deco style form when they emerge from the array of jigs and formers and come together in this simple vase form.