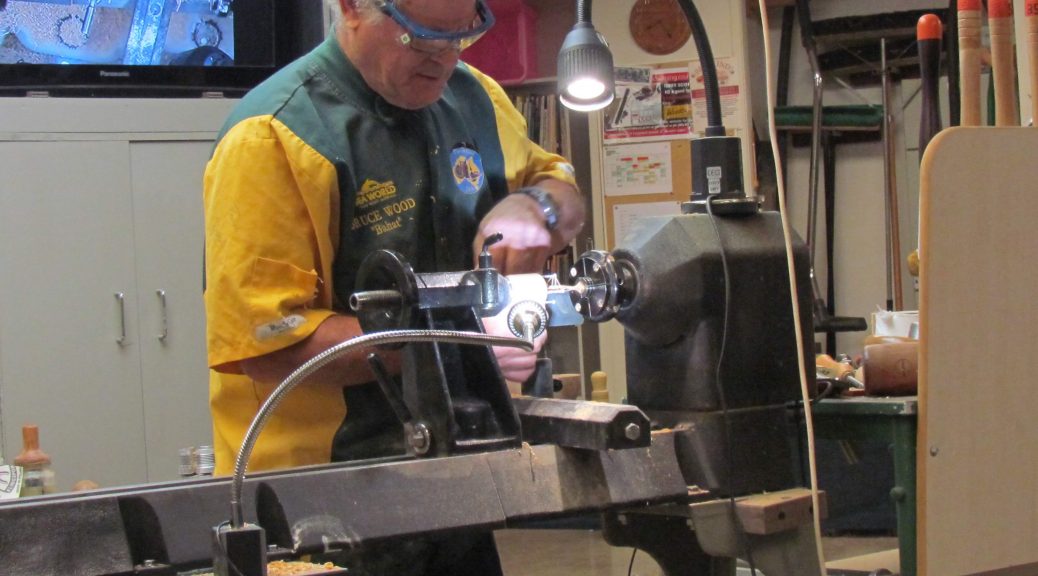
Demo by Bruce Wood (based on an Eli Avisera design)
Report by: Robin de Haan
Meeting: 19 June 2019
Comprises of three pieces: Cup, Stem and Base. The form is like an elongated stem goblet.
Bruce: “First you make a cup then streeetch it out”
Don’t wear sandals. Do wear a face mask. Stop the lathe before moving the tool rest.
Use fine grained wood with a straight grain for the stem, at least 400mm long, greater than 11mm wide.
Block of wood that will form both the cup and base, about 70mm wide, 150mm long.
Round and Prepare Spindle
- Centre Punch both sides of the block.
- Mount block between a drive centre in the headstock and a live centre in the tailstock.
- At 2000rpm, using a spindle roughing gouge, turn round. Start from ends to centre (to prevent splintering ends).
- Turn to a (70mm) cylinder. Leave headstock end 70mm wide.
- Turn a large extruding spigot 60mm or larger on the tailstock side (this will become the bottom of the base). Square off the tailstock side. Dimple centre. Move tailstock away for the next stage.
Start the Bottom of the Base.
- In the same orientation, move the round to 70mm diameter in self centering jaws (Bruce used 70mm ‘Infinity’ jaws).
- Using a bowl gouge, turn the 60mm diameter end slightly concave (so the base will sit stably), and make a 25.4mm wide recessed spigot (for expanding pin jaws). Add centre dimple.
- Finish bottom of base with optional pattern and ‘picture frame’ lines.
Start Hollowing the Cup.
- Put the 60mm (bottom of base end) into the jaws and clamp them closed. Tool rest across end (perpendicular to bed).
- At 500rpm, using a 5mm drill bit, go in 50mm (to help hollow and locate the ‘bottom of the cup’ depth).
- At 2000rpm, using a bowl gouge, hollow the cup.
- After shaping the cup centre hollow, Bruce used the wing of the gouge with a pull cut (‘back cut’) from centre to edge to finish the cup inner surface.
- At 2500rpm, using the edge of a negative rake scraper (prefer carbide cutter blade), tidy and finish inside. Move tool rest away.
- At 500 rpm, sand as prefered (Bruce used 120, 240, 320)
- Bring tailstock up and drill out the cup centre (for the stem socket). Then move the tailstock to the end of the bed to avoid punctured elbows.
Outside of Cup
- Move tool rest parallel to bed.
- At 2000rpm, with spindle roughing gouge, roughly shape the cup upper rim to about 65mm in diameter.
- Mark the cup inner depth (50mm) on the outside with pencil, and where the cup outer curve will reach bead (about 55mm).
- Starting at rim, cut downhill, with a ‘cyma recta’ ogee curve, to the diameter of the cup bead (i.e leave more than 15mm at centre which will become the cup bead). Aim for about 5mm wall thickness.
- Finish with a small spindle roughing gouge, measuring wall thickness with calipers as required. Don’t sand yet.
Outside of Base
- Keep mounted as is on the lathe, at 2000rpm. Mark 30mm from headstock.
- With a spindle roughing gouge, starting at the headstock side, shape from the jaws a cove (forming the top of the base). Leave centre at 10mm for the base bead.
- Use a small spindle roughing gouge to finish shaping the surface. Move tool rest away.
- At 500rpm, sand the surface if the base (Bruce sanded in reverse from 120, 240, etc).
Sand the Cup
- Using a thumb inside the cup to brace against sandpaper pressure, sand the cup outer.
- Supporting the outside of the cup, sand the inside.
Shape the Cup Bottom and Part
- Mark bead and end of cup bottom.Tool rest parallel to bed.
- At 2000rpm, use a tiny spindle gouge to carefully shape the bead cove down to 7mm.
- Use a tiny parting tool to cut the cup from the lathe.
Shape the Base Top
- Take the big jaw chuck off the lathe. Put small expandable pin jaws in. Expand them into the 24.5mm recessed spigot in the base bottom.
- At 2000rpm, using a spindle roughing gouge, roughly shape the base.
- Mark the base proportions – including the base bead – with pencil. (Bruce says “I don’t bother to get the dimensions too accurate).
- Bring the tailstock up. At 500rpm, with the 5mm drill bit, drill out the base centre to 20mm depth (which will become the bottom socket for the stem). Then move the tailstock away.
- At 2000rpm, with a mini spindle roughing gouge, shape a gentle cove ‘downhill’ from the tailstock side, to the outer diameter of what will be the bead.
- Use a small spindle gouge to finish shaping the outside.
- Then use a tiny spindle gouge to shape the bead. Use calipers to measure the bead cove is down to 6-7mm (carefully don’t cut into the socket.)
- At 500rpm, sand with grit as required to desired finish. “There’s nothing wrong with using sandpaper for some final shaping”, Bruce says.
- Decorate as desired. Bruce mentions a ‘texture tool’ will give different results depending on pressure, rpm and angle against surface. Quickly sand over again in reverse with finest sandpaper.
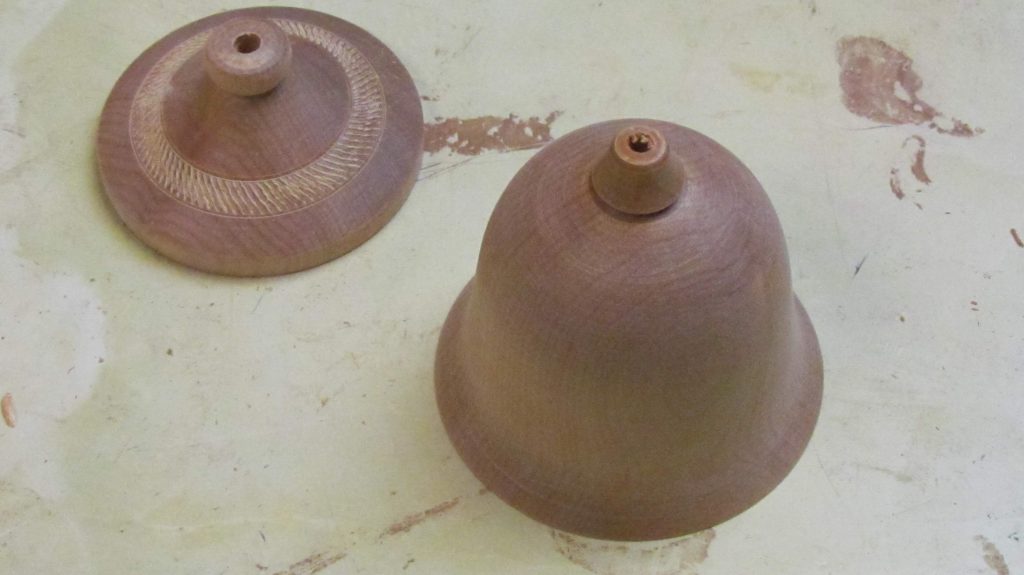
The Stem
“It’s good to have fine, straight grain”
- Take the wood shaft, 400mm long and 11wide. Measure and mark the lower ornamentation first: The 20mm bottom pin, 5mm bead and 30mm taper, and leave at least 5mm for a bottom spigot. Although these are turned last, you will want to know where the bottom taper begins as you finish rounding the stem.
- Mount the shaft through the drive centre, preferably using a small pin chuck (or can be mounted in the middle of self centering jaws (or pen turning chuck?)) with most of the length right through the drive centre hole, and only 40mm protruding.
Stem Cup Pin, Bead and Top Reduction Taper - Measure the cup pin hole (Bruce’s was about 24mm long and 5mm wide). Mark depth on shaft.
- At 2000rpm using spindle roughing gouge turn a pin exactly as wide as the cup hole. Measure pin with calipers periodically (don’t take too much off “You can’t put wood back on”). Test using the cup to see if it fits (spin lathe by hand, while placing cup to pin).
- Mark bead depth. Turn the top the the stem bead with tiny spindle gouge. Finish with skew chisel.
- Pull shaft another 30mm out of drive centre. Mark the taper depth.
- Complete bead bottom and cove with spindle gouge.
- Use spindle roughing gouge to turn the reduction taper from 10mm bead diameter to 5mm stem shaft diameter.
- Sand bead and taper to finish.
Stem Shaft - Install ‘French steady’ into tail stock. (Detailed guidance better obtained elsewhere!) Put the French steady waxed string into the cove between stem bead and taper. The waxed string should be looped around the French steady mounting pins to provide support in all directions while not impeding spin. Bruce “Not too tight or the string will melt.” Question “Why not use a 5mm bearing in the tail stock?” Answer “That’s not how it’s done”.
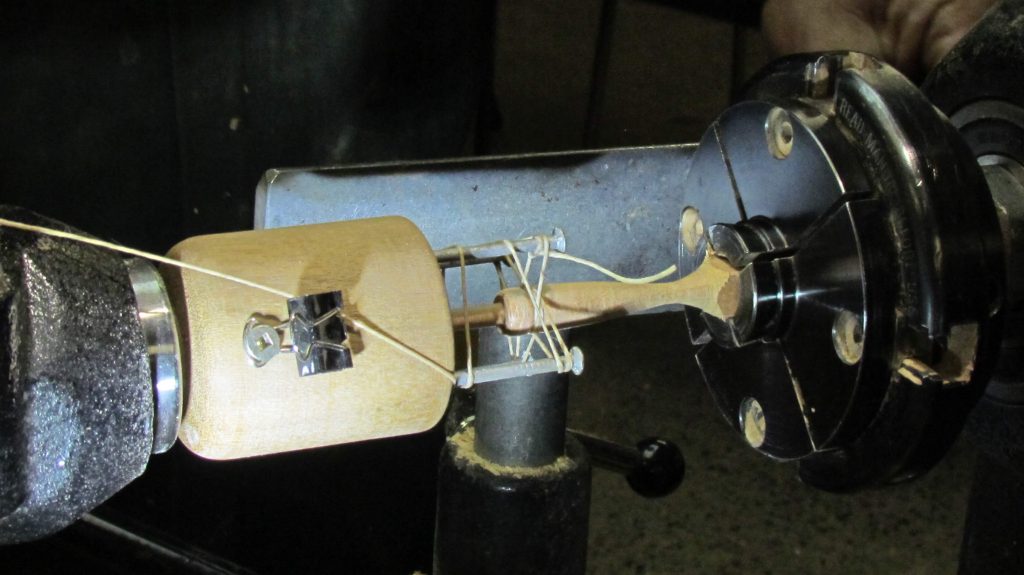
- Pull the shaft another 50mm from drive centre. Turn to 5.1mm diameter. Bruce used digital calipers to check 5mm diameter while the lathe was spinning.
- Skew to finish to 5mm using hand support on the other side to counter chisel force. Measure often with calipers.
- Bring another 50mm of shaft out of the drive centre. Gentle use Spindle roughing gouge and then skew to round. Bruce: “Work down 1mm at a time.”
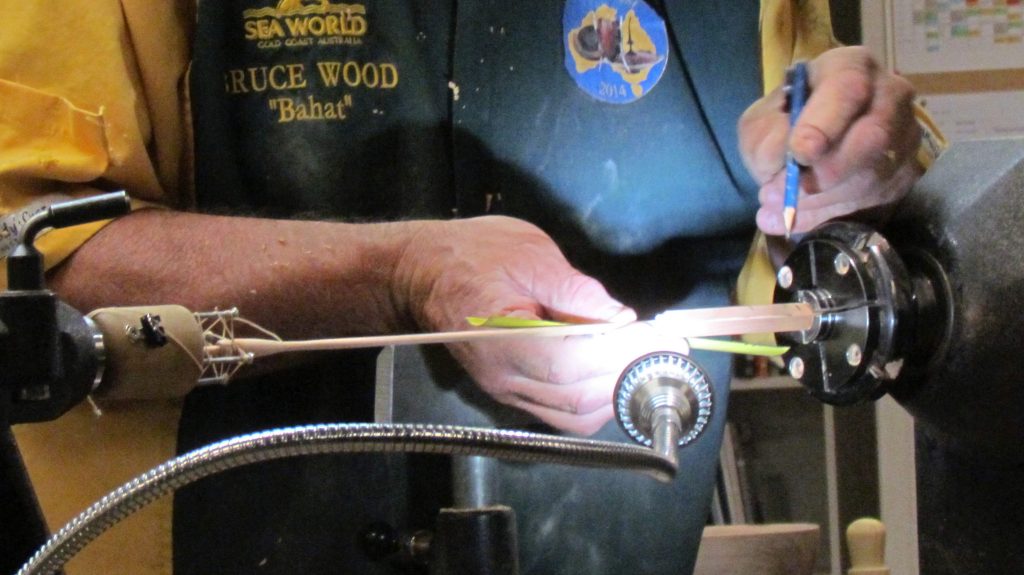
- Sand the previous 100mm. Remember to use hand support.
- Pull more of the shaft out to where the start of the bottom taper is marked (see step 39), about 40mm.
- Spindle roughing gouge to 5.1mm then skew, with hand support. Sand with hand support.
Stem Bottom taper, Bead and Base Pin
- Pull shaft another 40mm out of drive centre for the stem taper and base bead. (The stem may flex quite a bit across the 250mm mid length.)
- Spindle roughing gouge to turn taper from 5mm to 10mm, and round 5mm more for bead. Skew to finish.
- Spindle gouge to turn cove and bead. Sanding.
- Use a spindle roughing gouge to shape the base pin down to 5.1mm, and a skew to finish. Check with calipers. Test against the goblet base. Last sanding.
- Part with a parting tool.
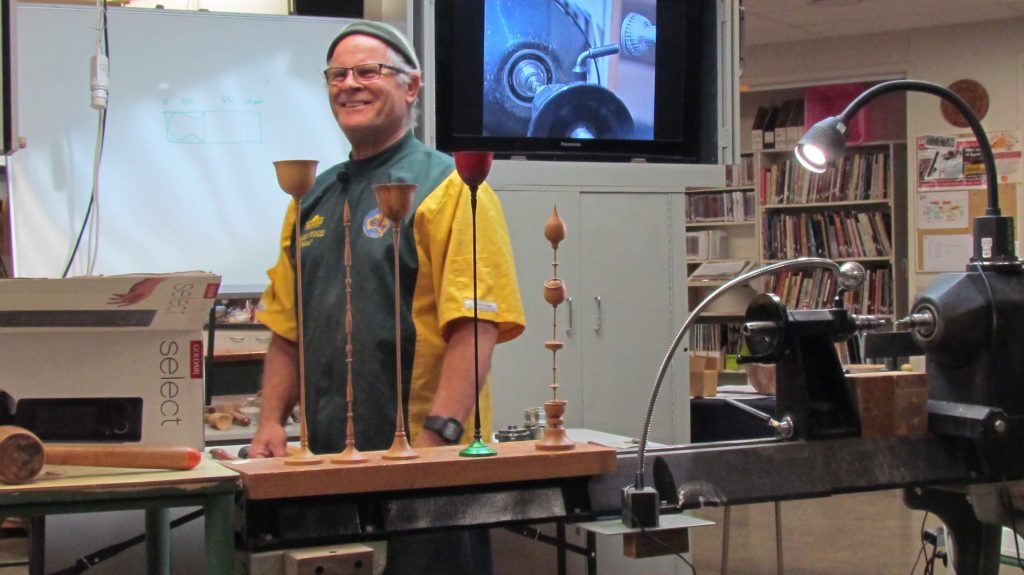
- Put together
- Now do it again with a 3mm stem!
